| XLCubed is now FluenceXL. The new wiki can be found here: https://help.fluencexl.com/ |
Difference between revisions of "Sending A Scheduled Report Using Integration Services"
| Line 11: | Line 11: | ||
#* When successfully tested, click {{Code|OK}} to confirm the connection. | #* When successfully tested, click {{Code|OK}} to confirm the connection. | ||
# Choose a local file path for the {{Code|WSDLFile}} property, set the {{Code|OverwriteWSDLFile}} property to {{Code|True}}, then click {{Code|Download WSDL}}. | # Choose a local file path for the {{Code|WSDLFile}} property, set the {{Code|OverwriteWSDLFile}} property to {{Code|True}}, then click {{Code|Download WSDL}}. | ||
| − | # If desired, choose a {{Code|Name}} and {{Code|Description}} for the task. [[File:RunScheduleUsingIntegrationServices General.png|center]] | + | # If desired, choose a {{Code|Name}} and {{Code|Description}} for the task. [[File:RunScheduleUsingIntegrationServices General.png|center|400px]] |
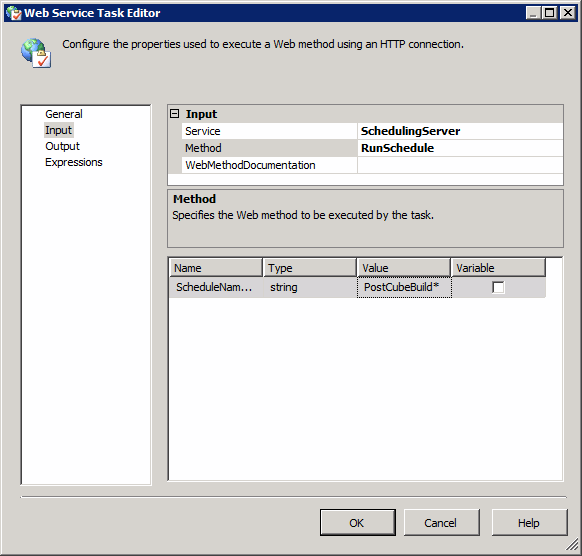
# On the {{Code|Input}} page, the input boxes should now be available. Select {{Code|SchedulingServer}} for the {{Code|Service}}, and {{Code|RunSchedule}} for the {{Code|Method}}. | # On the {{Code|Input}} page, the input boxes should now be available. Select {{Code|SchedulingServer}} for the {{Code|Service}}, and {{Code|RunSchedule}} for the {{Code|Method}}. | ||
# For the {{Code|ScheduleNameSearchPattern}} either enter the name of the schedule you want to run, or a simple pattern, using asterisk ({{Code|*}}) as the wildcard. For example, to match all schedules with names starting with {{Code|PostCubeBuild}}, enter {{Code|PostCubeBuild*}} into the textbox. [[File:RunScheduleUsingIntegrationServices Input.png|center]] | # For the {{Code|ScheduleNameSearchPattern}} either enter the name of the schedule you want to run, or a simple pattern, using asterisk ({{Code|*}}) as the wildcard. For example, to match all schedules with names starting with {{Code|PostCubeBuild}}, enter {{Code|PostCubeBuild*}} into the textbox. [[File:RunScheduleUsingIntegrationServices Input.png|center]] | ||
Revision as of 13:32, 23 August 2012
In this tutorial, we will set up an Microsoft Integration Services task, which will trigger one or more scheduled reports. We will assume a pre-existing Analysis Services Processing Task, and one or more scheduled reports.
- Open your existing Integration Services project in Business Intelligence Development Studio.
- In the Control Flow tab, open the Toolbox and drag a Web Service Task into the window.
- Set the task to run after the existing Analysis Services Processing Task as normal:

- Right-click the new task, and select the Edit... menu option.
- On the General page, configure the Web Service details:
- For the HTTPConnection, select New connection....
- The Server URL should be: http(s)://yourwebserver/XLCubedWeb/WebServices/SchedulingServer.svc?wsdl
- If necessary, set up the credentials and other properties for access to the website:

- When successfully tested, click OK to confirm the connection.
- Choose a local file path for the WSDLFile property, set the OverwriteWSDLFile property to True, then click Download WSDL.
- If desired, choose a Name and Description for the task.

- On the Input page, the input boxes should now be available. Select SchedulingServer for the Service, and RunSchedule for the Method.
- For the ScheduleNameSearchPattern either enter the name of the schedule you want to run, or a simple pattern, using asterisk (*) as the wildcard. For example, to match all schedules with names starting with PostCubeBuild, enter PostCubeBuild* into the textbox.
- On the Output page, select a variable of type Object to store the return value.
- The setup is finished. The schedule should run when the preceding tasks have completed.


